, once across with basic grey ink, then with basic black but very lightly and then with black with normal pressure. This gave it a more three dimensional look. Next I stamped the Season's Greetings from another one of my favorite sets Curly Cute with Stampin' Up!'s Real Red ink.
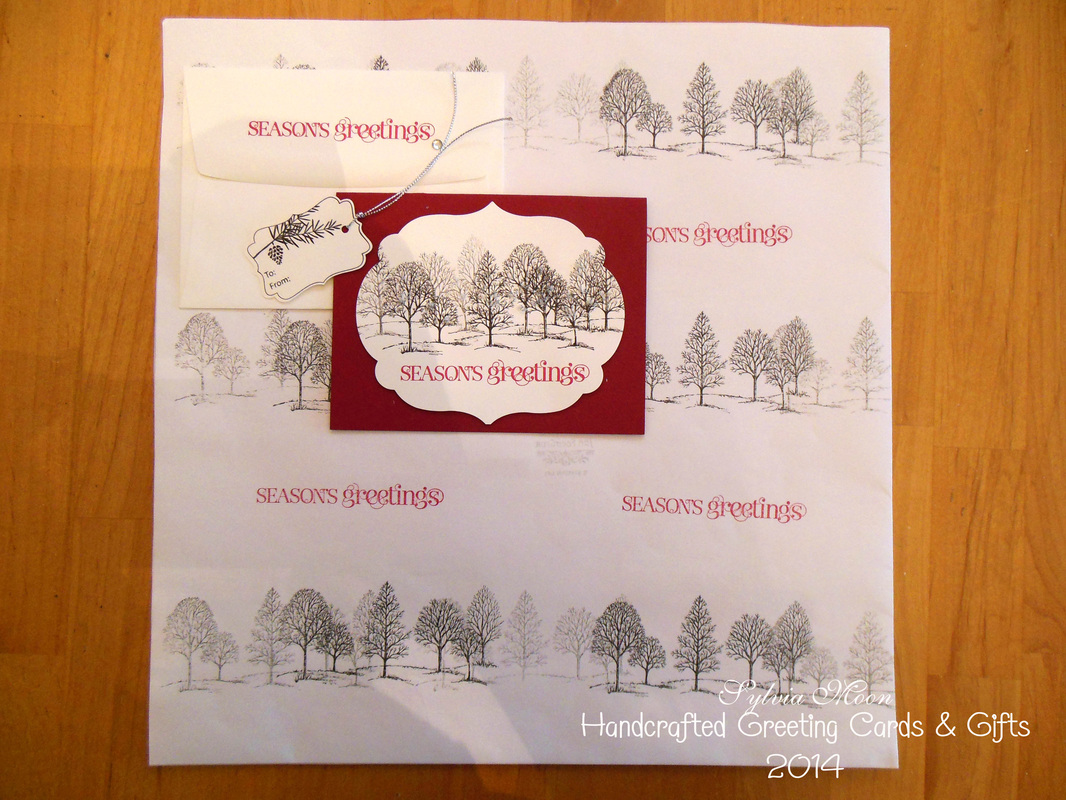
Here are the pictures I promised you. This is a wrapping paper set I made with Stampin' Up!s classic tree stamp set Lovely as a Tree . I got the white craft paper on a roll from Hobby Lobby (my favorite craft store) and cut the paper to size, then stamped the trees three times , once across with basic grey ink, then with basic black but very lightly and then with black with normal pressure. This gave it a more three dimensional look. Next I stamped the Season's Greetings from another one of my favorite sets Curly Cute with Stampin' Up!'s Real Red ink. 
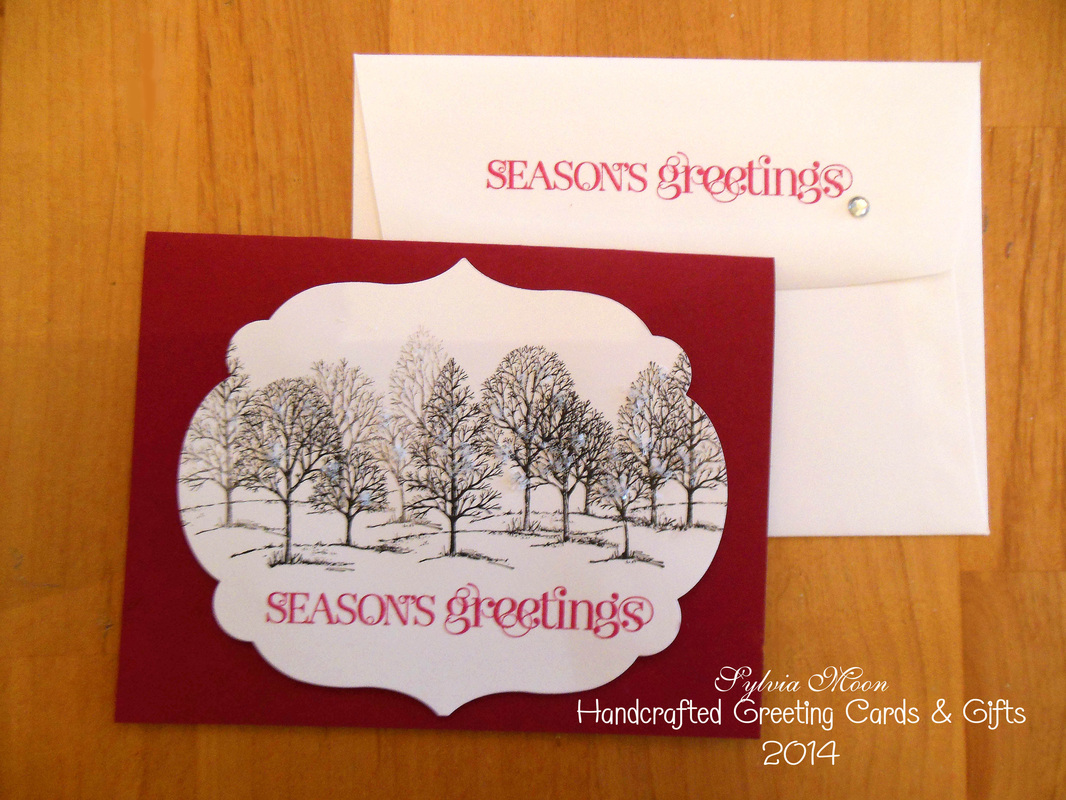
Here is the card from the set. I used Cherry Cobbler card stock. On top of that I used a large label die cut and stamped it with the tree set essentially the same way I did the wrapping paper. I had to add some glitter to this though for some shimmer and shine! Stampin' Up! has this amazingly fine glitter called Dazzling Diamonds I will be working in the studio again next week designing more mini albums, cards etc. Thank you to all my supporters; Megan, Denise, Mary and all of you who visit regularly. A special thank you to Judy who gave me my favorite tool - my Big Shot. And last but not least, I could not keep going without you, Ginger.! A Very Merry Christmas to Everyone!
0 Comments
I am working on a couple of Christmas orders right now so won't really be generating any new things for a while. I realized though that for some reason the items I am filling for the orders, though not new, were never posted. One of the cards was a design created by the artists at Stampin' Up!. I made a few changes to make it my own, but not enough to really say it's my design, so I won't be posting a picture of it. The other card I did design myself and made wrapping paper and a gift tag to match. I will be posting that as soon as the order is completed. Do not think I have forgotten you. Thank you for visiting today, I will have something for you soon.
Here is the snowflake ornament card I created yesterday. I am really happy with this design and I hope you like it too. First of all I designed the background paper myself by using masks created by using the negative spaces left over from snowflake die cuts and from using a positive image (the white snowflake) of a snowflake die cut. The "designer paper" was then affixed to the base card and to the envelope. I really love lining my envelopes to coordinate with the design of the card. The snowflake was made with silver glimmer paper using two different snowflake dies. I punched a small hole at the top and used silver cord to tie the ornament which you can detach from the base of the card. You can then use this glittery snowflake on your tree or as an embellishment for a gift! The top portion of the card is open so you can carefully slide out the rest of the cord. On the front of the ornament is a rhinestone because - you know - it needed some bling. I purposely left the inside of the card blank so you can choose you own sentiment which I will match a greeting to on the envelope. Please see my list of Christmas sentiments on my winter 2014 gallery page (gallery pages have pricing information as well) or if you want something special let me know. You can also choose to leave the inside blank for your own sentiment. Click on Christmas stuff or other categories to the right for additional details. Please contact me soon to place your order. Thank you for visiting!
. -Just an added note; the black background is temporary because my other table is being used by the other artist in the house. I am not sure if I like this background better - how about you? Please leave me a comment! |
Archives
February 2016
|