I am working on another bathroom tissue album, but this time it will be with a Halloween theme. Please check back this weekend for some previews. I am simultaneously helping my daughter re-organize her room so my work in the studio will be spotty at best. However I am excited about this mini album 'cause I have fun stamps and I just picked up some "spooky" stickers at the Goodwill that I think will look cool!
|
I finally finished the Tissue Paper roll album last night. 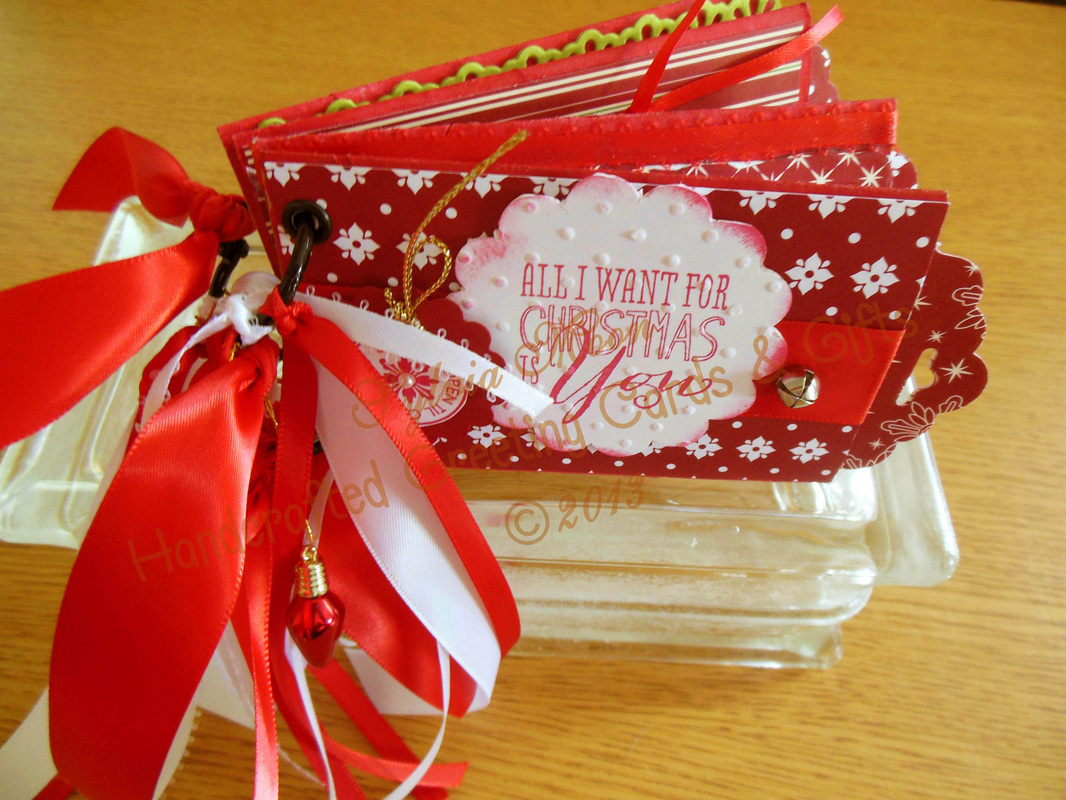 I pretty much covered the details on how I made the cover on my blog from July 13th. I finished the album with various sizes of red and white ribbons and little red light bulbs. 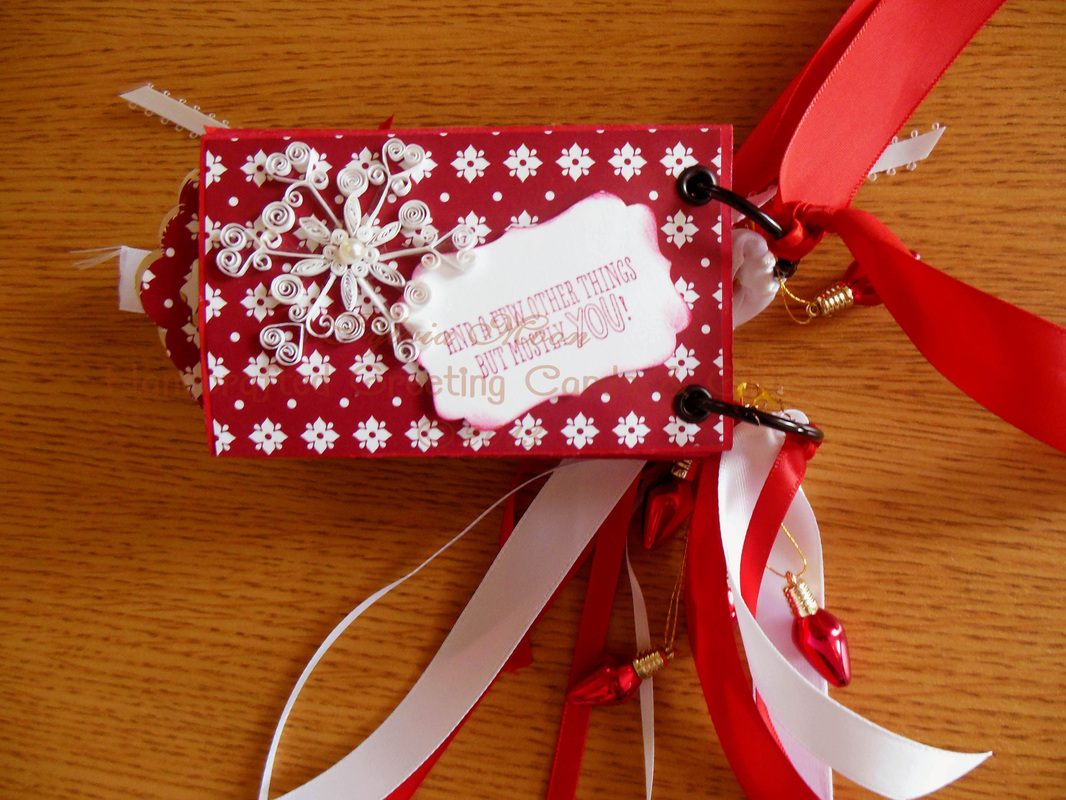 back cover stamped with "and a few other things, but mostly you!" This album will be for sale at my Christmas Shows for $20. I don't have specific dates yet, so please check back often. I will be making others and if you would like to put a custom order in now, please go to my contact page and we can put something together to fit your special person!
Sorry for the delay, I will be back in the studio tomorrow, so please visit again Saturday or Sunday night. Hope you are all enjoying the cooler weather.
I promised you a post today so I hope you don't mind if I share the process of making a T.P. roll mini album. I have been seeing a lot of these lately and decided to try my own  I am going to use four tissue paper rolls for this album. The first thing I did was flatten them with my big shot machine. I used rubber bands around all the rolls, overnite to keep them flat. Some people put books on top of them. Then I painted them with red paint. You can use any kind you want like tempera etc. I used an acrylic paint on both sides and then on the inside as well because I am going to use the insides as pockets for tags and I didn't want the plain cardboard to show. 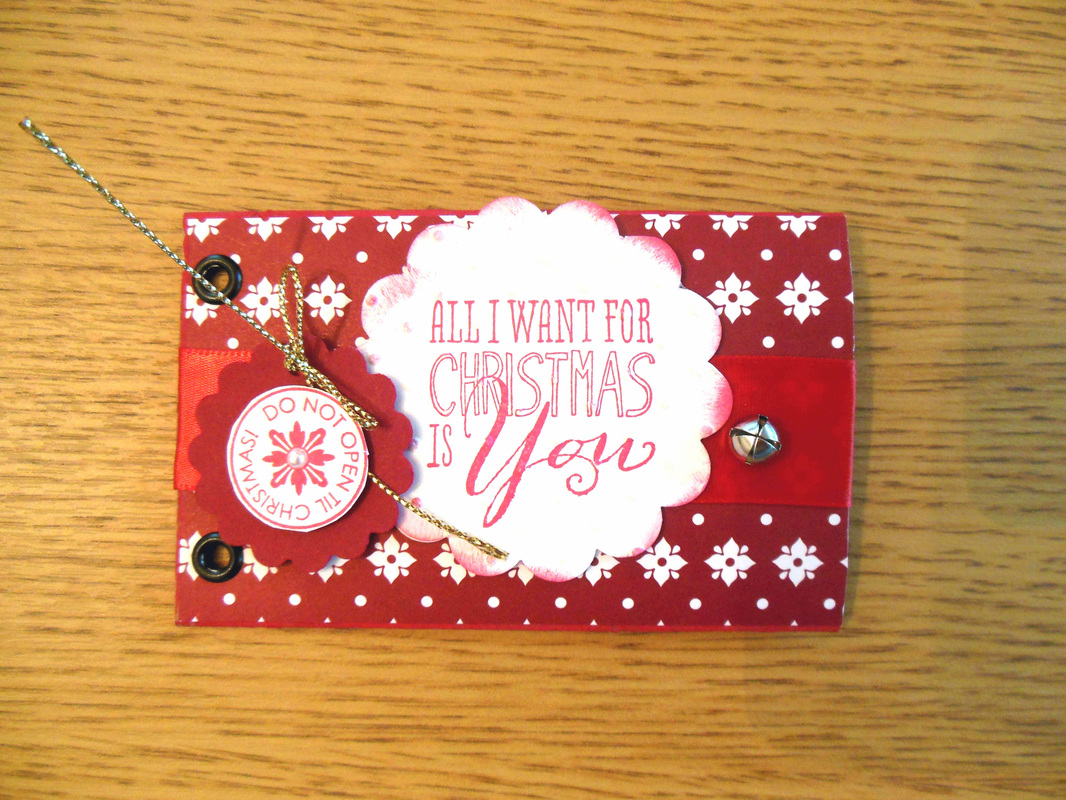 This is what the cover looks like so far. I have used Stampin' Up! designer series paper to cover one side and put a red satin ribbon in the middle. Then I punched two holes - on on the top and one on the bottom- with my Crop-a-Dile. Next I put in some eyelets to connect the "pages" and a "jingle-bell" brad to use as a closure. I punched a piece of
Whisper White card stock with a 2-1/2" scallop punch, stamped it with the greeting "All I want for Christmas is You". I have loved this song ever since I heard it from the movie Love Actually so when S.U. offered it in the Christmas stamp set; Christmas Messages - I decided I had to have it. I then took the punched shape and ran it thru my Big Shot in my polka dot embossing folder to give it a "snowy" look. I glued it to another scalloped shape to give it a little extra support. Then I distressed the edges with red ink. Then I affixed this with snail (S.U.'s glue strip). Next I used stampin' dimensionals to affix the "do not open til Christmas tag". I will be keeping you posted with the progress of this mini album as I go along. Please leave a comment or send me you questions. Thank you for visiting and have a nice rest of the day! I am taking a bit of a break for a couple of days to catch up with housework and other boring things like that. . . and my work schedule this week has been very irregular. - You know people are on vacation/holiday - that sort of thing. I plan on having something for you on the weekend so don't go away. I appreciate your visits.
I just received the pictures from Sabrina last night - I guess I should have been a little more patient.. . . I want to apologize in advance for all the color and lighting shifts. 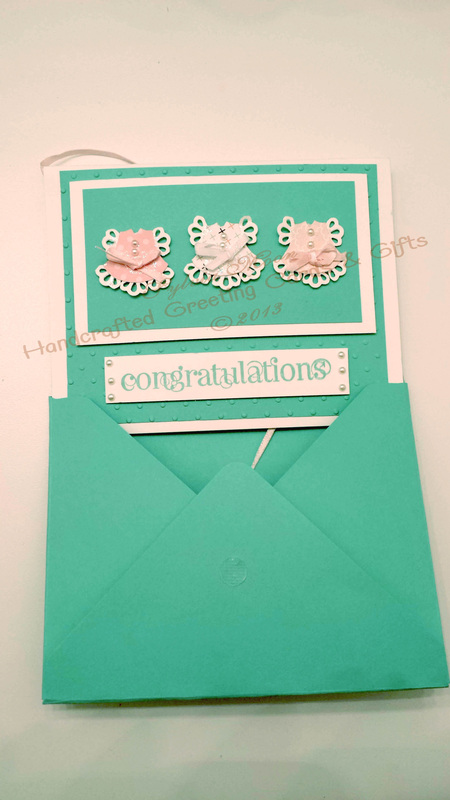
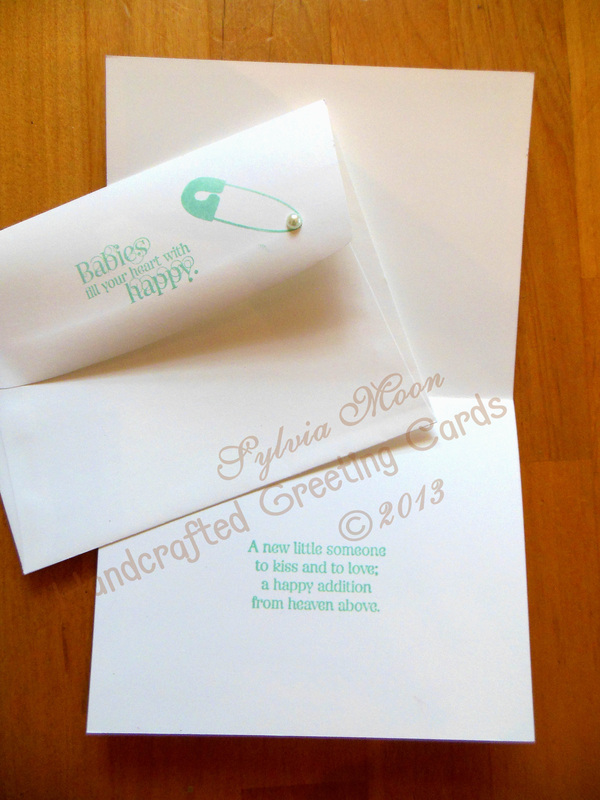
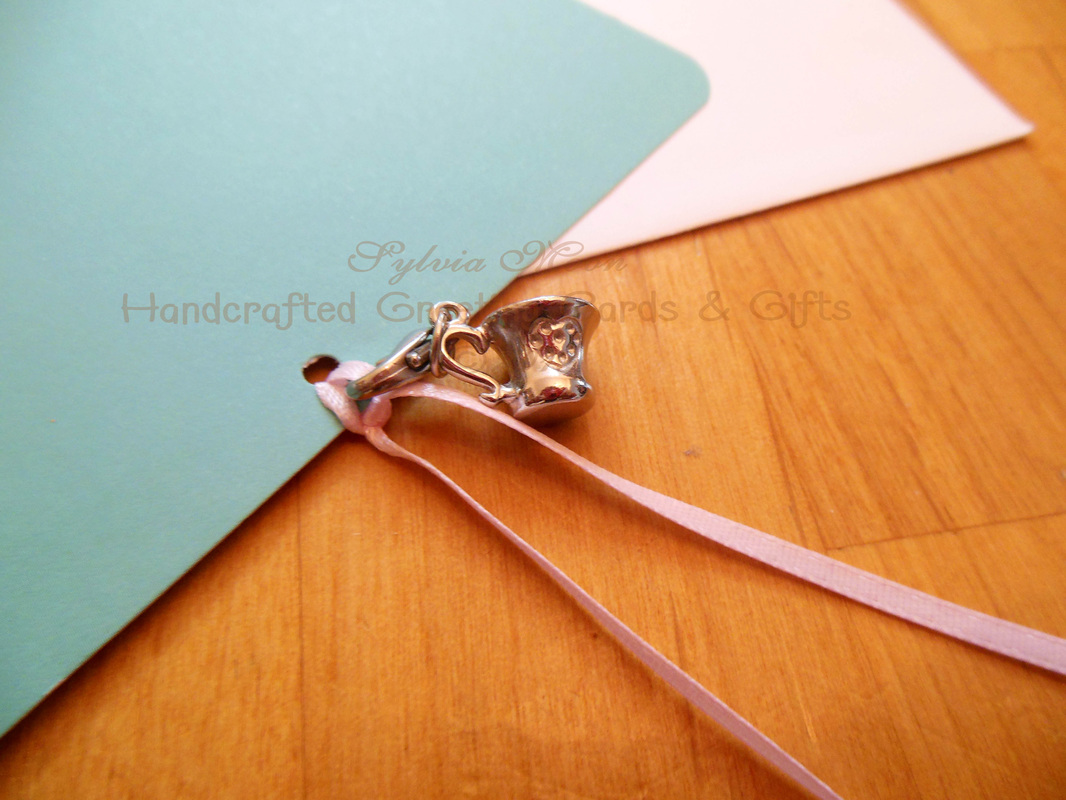
I forgot to put the pictures my daughter took of the card insert and detail of the little cup charm, so here they are. 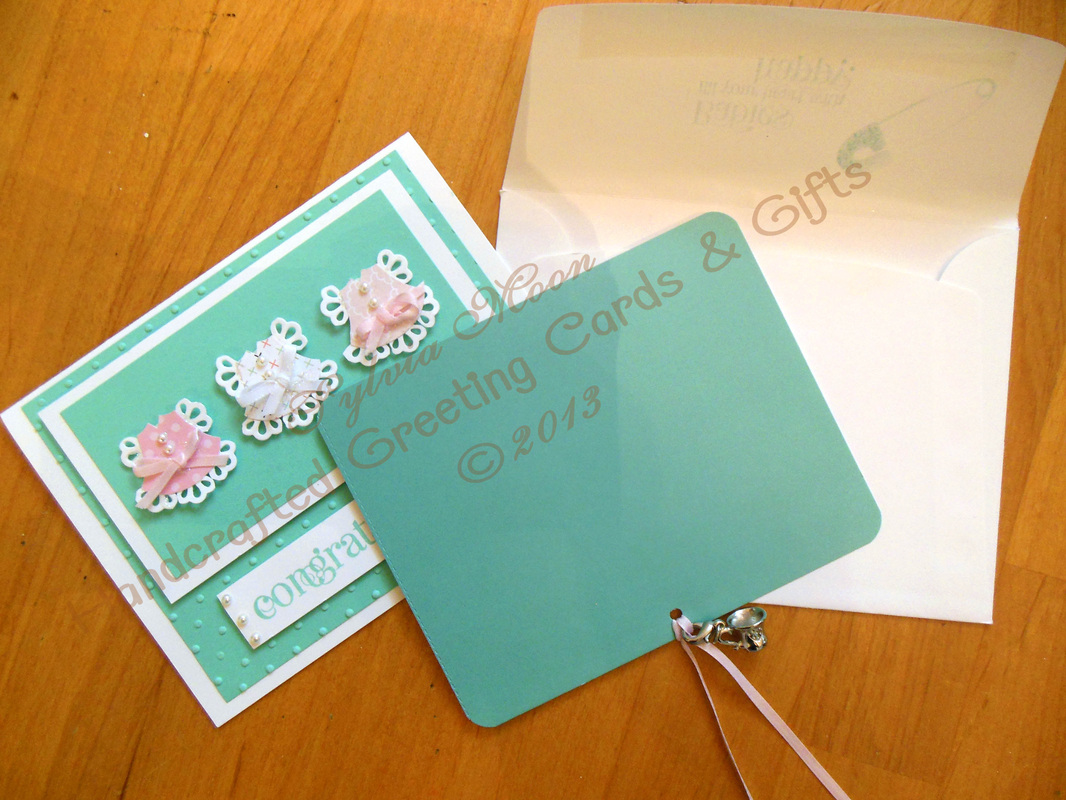
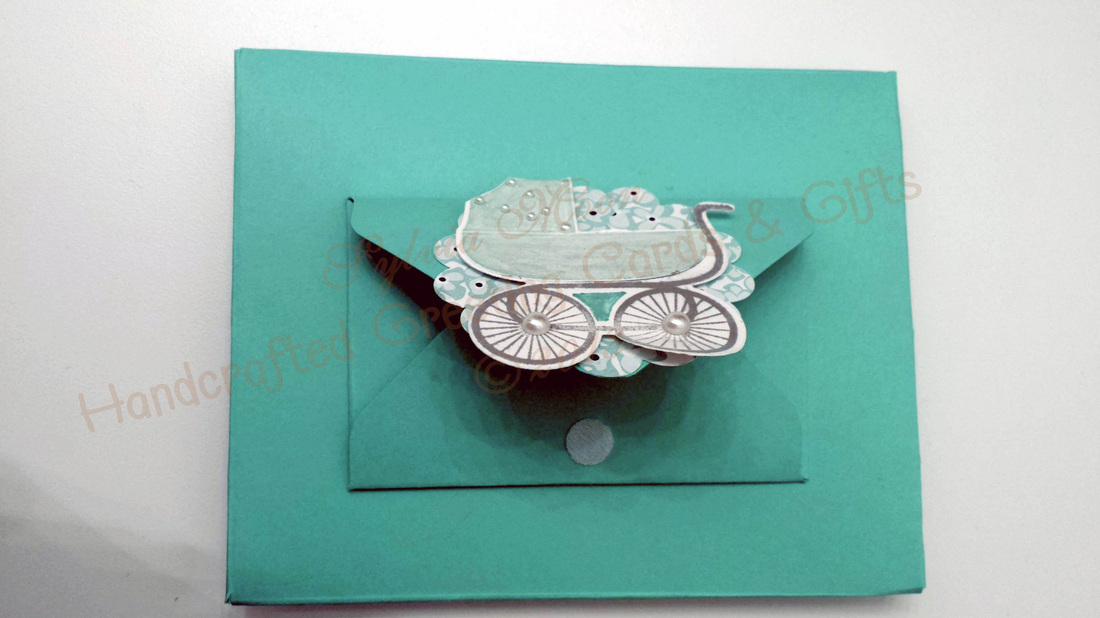
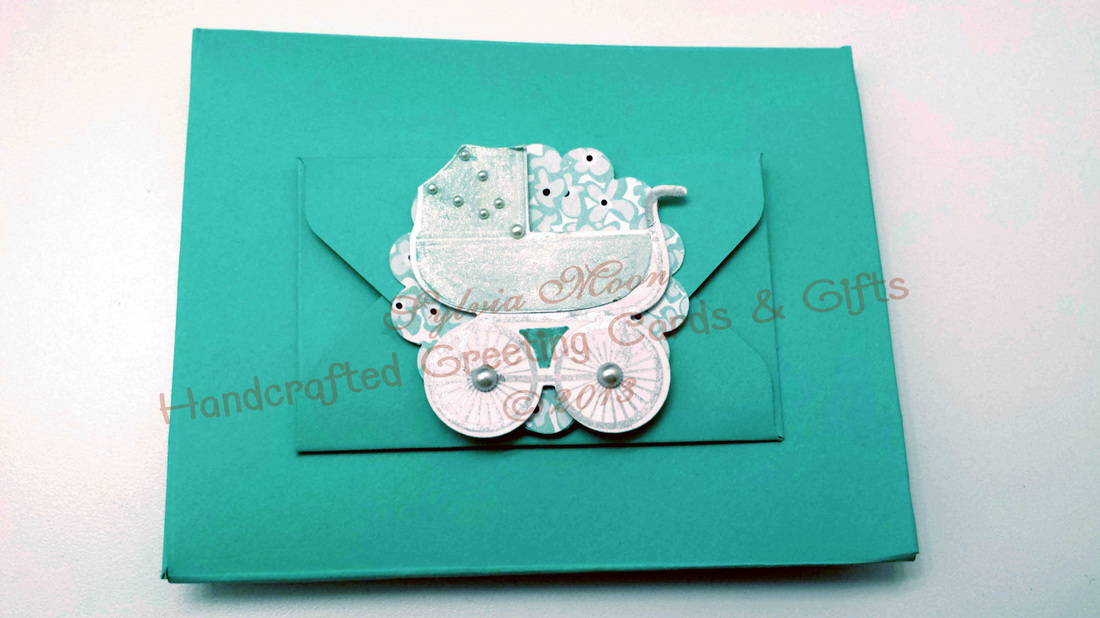
The two pix above are of the front of the new envelope with the attached credit card envelope. I used my new Sizzix die - Baby's Firsts from the bundle that includes the Stampin' Up! stamp set - Something for Baby to make the baby carriage. I first stamped the carriage with Bermuda Bay ink and covered it with - Wink of Stella - to give it a frosty look and then cut out the carriage top. Next, I stamped the carriage with silver ink so that the wheels and handle would look like metal and then I glued the carriage top to the silver image. I added tiny pearls (which are actually white) to the canopy and medium sized ones to the hubs of the wheels. I used velcro dots for the closures. Below is the back of the envelope with designer paper cut with a small scallop punch. This also has a velcro closure. 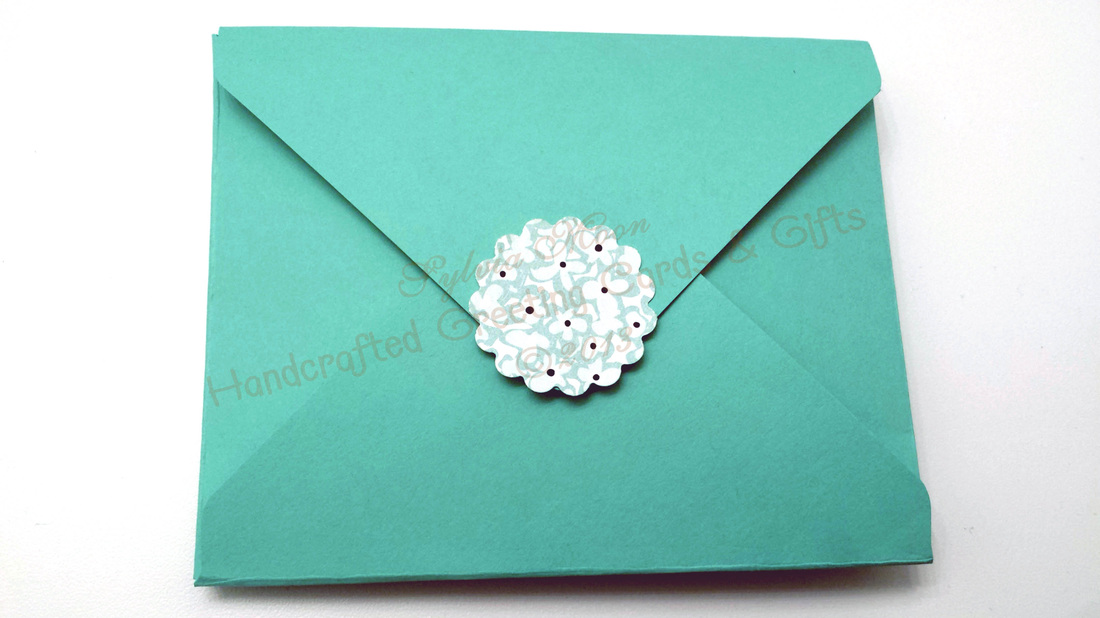
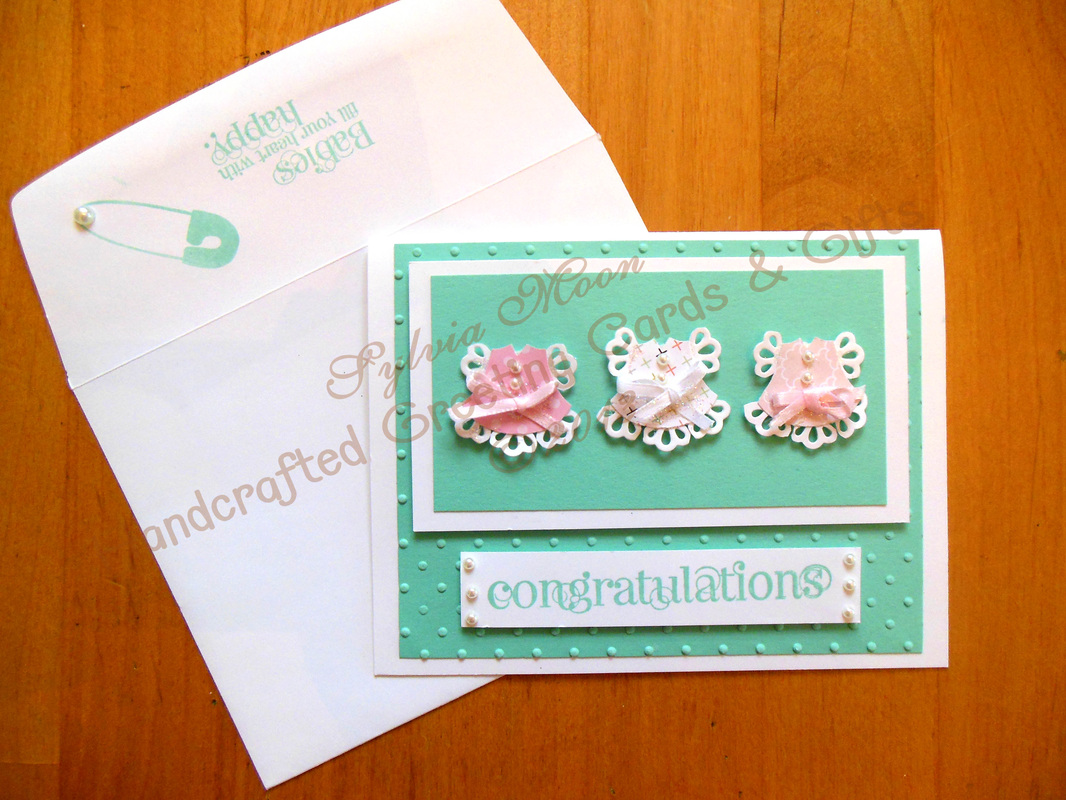
embossing folder and glued on the base. Then on top of that is another piece of Whisper White card stock and another piece of Bermuda Bay card stock. The baby dresses are embellished with little pearls and ribbons. Though you may not be able to see it from the picture the dresses have been glitterized (gives them sort of a sugar plum fairy look) and attached with dimentionals. The "Congratulations" is stamped with Bermuda Bay ink as are all the greetings. The pin on the envelope has been embellished with a pearl as well.
-HAPPY INDEPENDENCE DAY TO YOU-  So here's where I keep my ribbons - well at least the ones on spools. The loose ribbons I keep in my animal print boxes. This shelf originally came with a different board, I think for towels or other flat items. I put a dowel rod in there instead and from the looks of this picture, seems to need a stronger one. If you look back at day 1, you will see that this unit is above my DVD shelving unit.
 Here is a picture of my sewing machine cabinet and chair that I got from Sears when I was about 20 years old - OMG, this would make them vintage or retro (1970's). I never liked the pattern on the chair as it is Early American. I do sew - I actually took advanced sewing classes in college (which by the way I received only a C ) but haven't made any thing with a pattern for quite a while. The sewing machine cabinet is now more of a storage table. The chair has various sewing notions which I do use. On top of the sewing machine cabinet is a little oak shelving unit which I will have Emily put up when she gets time. To the right is Lavendar, who is about ten years old - give or take a year or two. The plant you saw on day 1 of my tour is one of her babies. I didn't mention it then, but that plant is sitting on one of those old drum sewing baskets that I think may be vintage or antique (I am not actually an expert in this field so I use the terms loosely). The stool Lavendar is sitting on was not comfortable for the purpose it was made, but serves as a great perch for her to bask in the sun. (She needs pruning - but isn't she beautiful?) 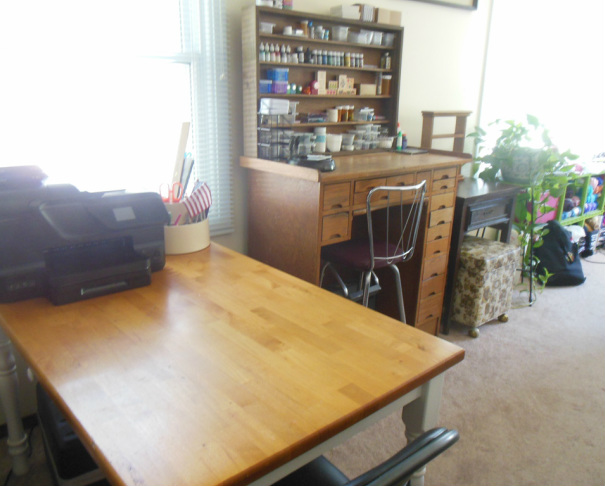 Here's a landscape view of one side of my studio with my dining room table (which I got from my good friends' Carl and Judy a few years ago) As you can probably tell I don't actually use it as a dining table, but more of a workspace. I love the look of the wood as a background for the pictures my daughter takes of my projects....let's face it, I just love wood - real wood, which is hard to find anymore unless you have money. Even at that, the quality isn't what it use to be. I think it gives a warmth to a room and I love the feel of it and the strength. Well I'll have to stop there or some of you will think I want to marry it! Beyond my plant you can see a little of Emily's studio, but that's for her to share.... I am not done with my tour so please stay tuned.
So here are my background wheels. I use these to make designer paper or backgrounds on things like gift bags. Stampin' Up! has retired these and now sells background stamps instead. I guess a lot of people found it difficult working with the wheels...I know I do, but I still really like them and will continue to use them. 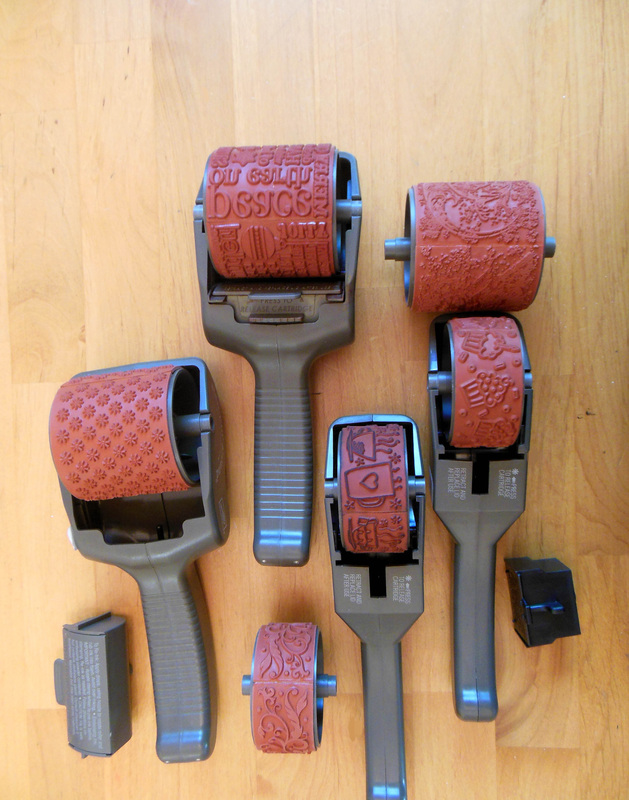 I've got a lot of punches; there's my owl builder punch, bird builder, various flower punches which I've used on Maria's mini album, cupcake builder, ornament, a couple of edge punches etc. And these are not all of them. I've built up quite a collection over the short time I've been with Stampin' Up! In actuality, the two front punches are Fiskars - not S.U. 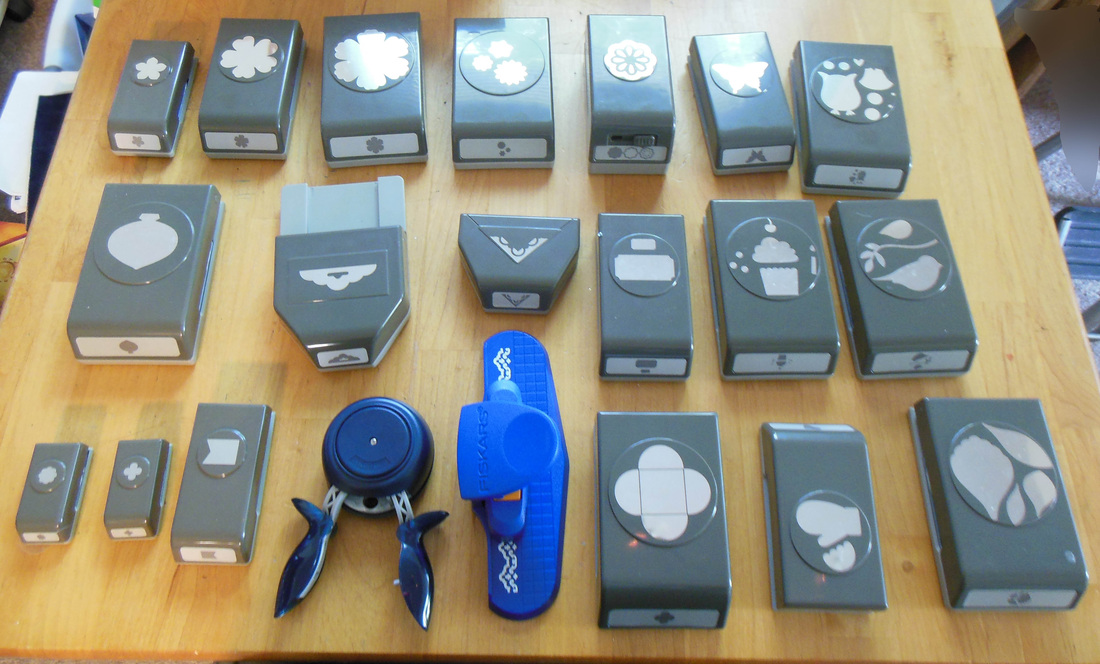 There's more to show you, so please come back either tomorrow or the next day. Thanks for visiting!
I am revamping my studio this week (actually started Saturday) with my daughter's help. She put together a DVD shelving unit that I purchased from (GASP!) Wal-Mart. (Main Stay) We were both surprised at the quality of the product (it is press board and veneer but still well made and sturdy) but the way the directions co-ordinated with the labels stamped on the shelves and actually had a picture you could lay the screwdriver on to match up was pretty nifty. I decided to go with a DVD unit because my cling stamps come in DVD cases and therefore it seemed a natural thing to do. I can get 29 cases per shelf - a little less if I include the new wood sets. I had to move my big watch desk and hutch yesterday which I tried to do by myself - not too brilliant. I began to think I had hurt my back so I had Emily (please see button below to link to her site) help me with that and with moving my sewing machine as well. I didn't think to take pix of where they were before and my daughter wouldn't let me take pix of her this morning putting the DVD shelving together....I think it had something to do with her being only in pj's. Anyway, there were some snags with the shelving - is anything ever without snags? I am happy with it though, because I have a place for my stamps where I can find what I am looking for easily without having to rummage through container after container or continually moving things here and there. Yeah I am happy with it! 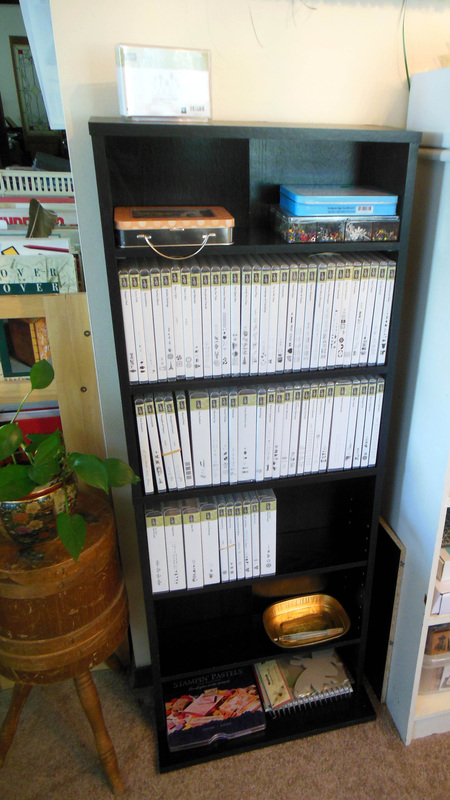 Here's my white book shelf that I bought a while back at a thrift store for about $20. 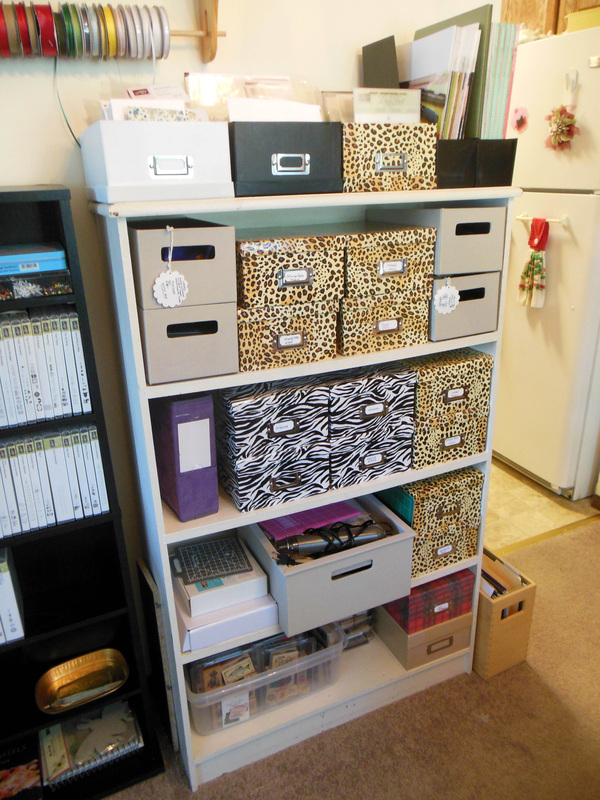 I bought the animal print photo boxes from Hobby Lobby and Micheals' when they were on sale. I keep my Stampin' Up! wood stamp sets, my wheels, ribbons, adhesives, acrylic blocks, cellophane sleeves and various other things in them. I was going for a "travel" or "exotic" theme when I got them. Come on back tomorrow if you can, I will have more to add to the tour.
|