Here is a wedding card I made for a very fine gentleman I work with. I wanted to make something different and this is not my original design. Once again I found the design online and altered it. It came with a template which when I printed out was very small. I ended up having to tweak it a bit (actually a lot) and then did a few other things to make it my own. I found this design by Lynn Pratt. (Click the button below to be connected to the site) 
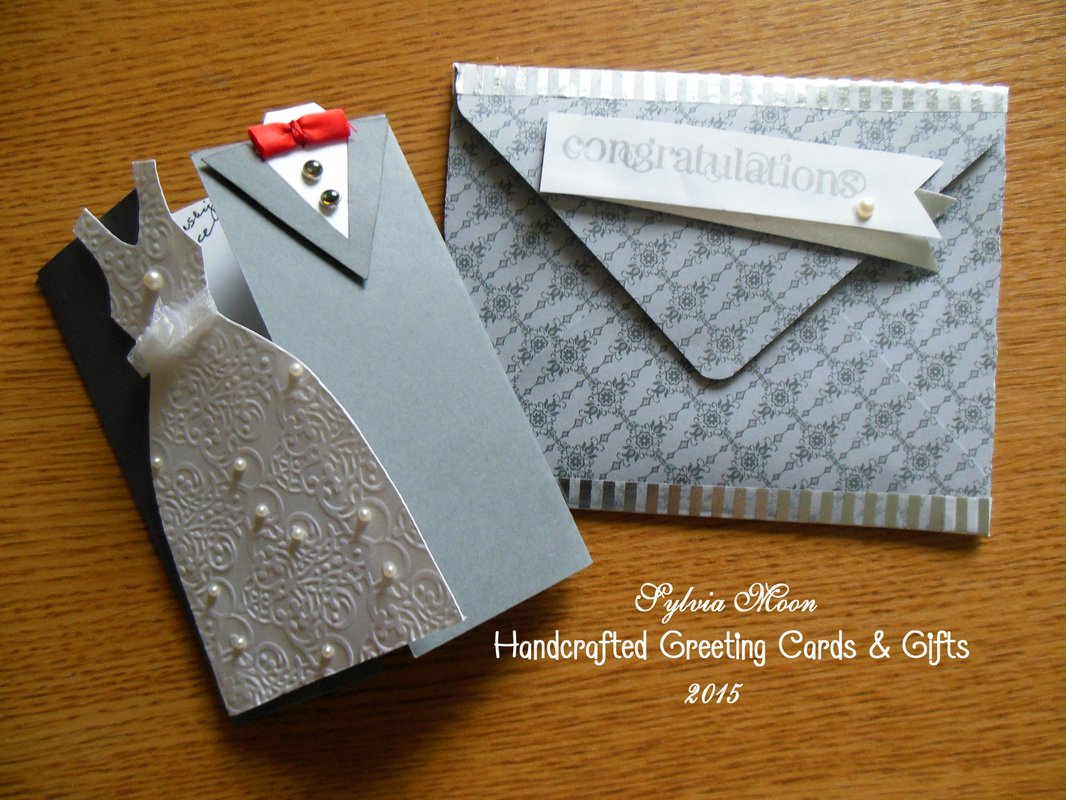
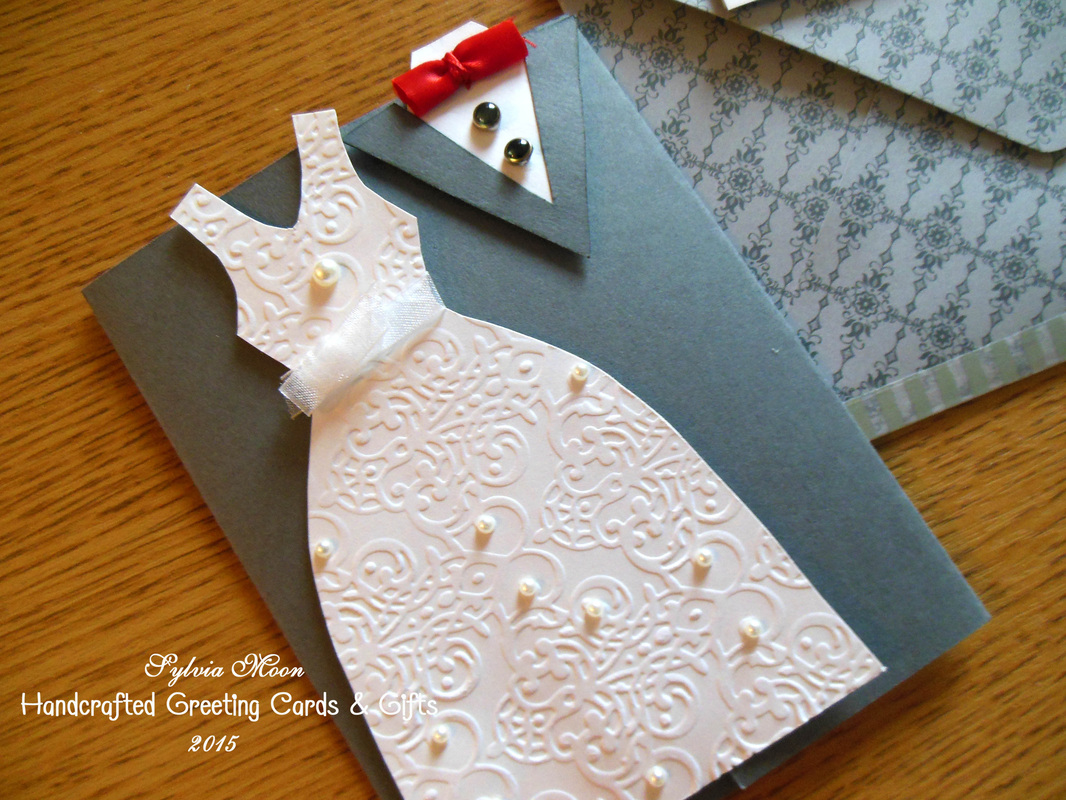
I was going to use black for the card base, but then decided that was too cliche' and grey seemed more elegant anyway. I used brads for the buttons partly because they would hold up better, but also because I thought those too looked more elegant. I first made the bow tie out of card stock but wasn't happy with the shape that came with the template. Then it came to me to use ribbon and I played around with that until it looked the way I wanted. The dress was a little easier. Wait what am I saying. It too was too small and so I had to enlarge it. I didn't want it to be plain so I ran the card stock through my big shot. It was a little tricky centering the image in the embossing folder to get the placement of the design just right. I think it came out nice though. I also thought it needed a little pizzazz (don't you just love that word?) and was going to place rhinestones on strategic places of the design. The pearls look more elegant though, don't they? I liked the way the design of the card has the bride and groom like a doorway and when you open it, you have the insert for people to sign what they want. I didn't put a sentiment on the inside because this card was from all our co-workers whose sentiments were more meaningful than anything already in existence. I stamped the envelope in silver encore ink and set it aside to dry for a few hours. When I went to put the card in the envelope, I found the design went beyond the dimensions of the envelope I had. so that called for a custom made envelope. It was already midnight and I had to go to work in the morning. What to do? Why continue with the project until it was done of course, especially since the card needed to be signed the following day. As luck would have it, I ran into all sorts of problems and didn't get to bed until around 2am. But art is like that. Never the less, I was very happy with the final results. What do you think? I will have another card for you next weekend. Please leave me a comment below. As always thanks for visiting! 
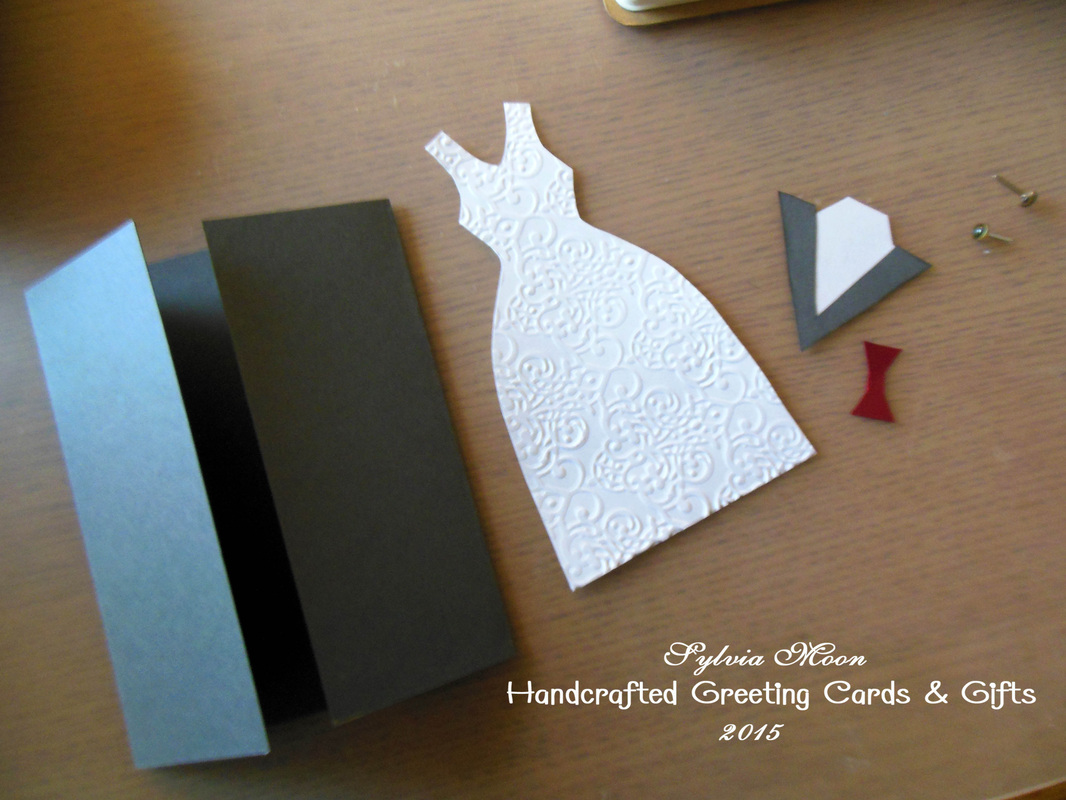
By the way, here are the card pieces before assemblage!
0 Comments
I have a standing Friday night arrangement with a friend that comes over to have dinner with my daughter and I and we do various things after. To get to the point, my daughter had the idea that we could start doing some art projects - aside from the art journal thing which we started with our friend as well. Her first idea was painting gym shoes, - well - they are like a canvas. My daughter and I did black shoes, but our friend wasn't able to find a black pair in her size so she did white shoes. However, she wanted to use the neon paints we were using so she painted them black first. Clever! Mine are the shoes all the way to the left. I like the shoe with hearts, but I sort of lost momentum with the one on the right with flowers. What do you think? Please leave a comment if you want to see more projects like this one or have questions. As always thanks for visiting!
Hi Everyone. Have been working in the studio but won't be able to show you the cards I have been working on until the recipients get them. I have also been working on my Art Journal Please note, If you don't see anything on this page, please check my art journal tab. As always, thank you for visiting!
I am curious what you think. Do you prefer a card or a mini album or other item that is created by an artist or artisan using high tech computers to create their work or those that use more mechanical simpler means? Would you rather the product look like it was machine made or have a high quality handcrafted appearance? Please leave me your comments below.
Hi Everyone! I am very excited to be adding another page to this site. Please take a look at my art journaling blog. I plan to update this rather often. . . hopefully every week. Please leave a comment with your thoughts. As always thank you for visiting!
I am changing my site a little. . . please bear with me while I do this. I want to share new things with you, but rather than have you wait until I am happy with the final result. . . things will be a little up and down as I am still learning website design. Please feel free to comment or ask questions. As always thanks for visiting!
This is the latest Tissue Paper Mini Album I've created. I used a Cowgirl Theme using some designer papers I created myself on Photo Shop. I also used Stampin' Up! card stock, inks, ribbons and punches. Some of the ribbon though, is from various craft stores that I have accumulated over the years from Micheal's and Hobby Lobby as well as charms and embellishments - new ones and others in my stash. The cover is a wanted poster with a "cactus rose" design using a resin cactus and punched out flowers which were daubed on the edges and glued together and shaped. I also attached little butterfly and flower charms to the ribbons.
I used some plastic lace shelving I'd gotten recently from my friend Ginger, but then realized their was an actual back because, you know, if your putting it on a shelf it doesn't need to look as nice on the back right? Luckily I had some other lace ribbon that I attached to give it a better finish. Whew! On page 1, I made a little pocket with a cowgirl embellishment. Inside the pocket is a folded card that can be used for writing little notes with maybe a picture or ticket enclosed. On page two is a little booklet I made, that is held in place with a green bow. Page 3 has a pocket trimmed with lace and is held with small white button brads and 1 white flower brad. Page 4 is plain except for a green satin ribbon at the bottom. Pages 5 and 6 are also plain to allow for pictures. Page 7 is also plain except a border of lace and green ribbon trim. Page 8 is one of my favorites. It features a stamped mama and baby horse which are cut away and affixed to the page to give it a 3d pocket. Behind it is a folded piece of card stock that can be used for notes. below are the inserts which have been stamped with various western themed images in silver ink. This is the back cover of the mini album. Here I've used a stencil (wild), a piece of hemp cord as a lasso, a cactus stamp and a resin boot which was over painted with a white shimmer paint. If you like this album, please leave a comment.
I will be doing more of these albums so keep checking back from time to time. If there are some themes you'd like to see, or if you'd like to order a custom design for yourself or as a gift please go to my contact page to place your order. As always thanks for visiting and don't forget to check my other pages! Happy New Year Everyone! Last year was not the best but it did go by rather quickly. I am hoping 2015 will be a better year all round. I plan on having a lot more cards available both in quantity and category. I also plan to have more mini albums and new products. I am also open to suggestions from you, so please post your comments! Here are a few new stamp sets I've purchased recently. I am looking forward to working with them...I think they will be a lot of fun.
|
Archives
February 2016
|