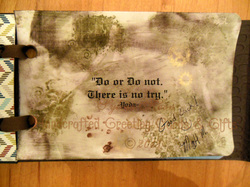
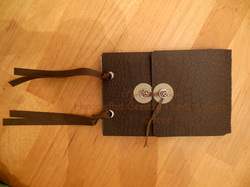
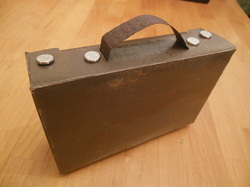
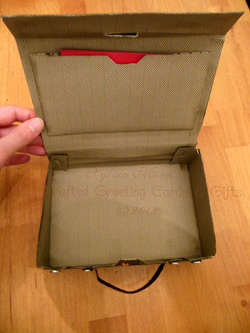
Here is the picture of the free card I promised you. Post your comments today! 
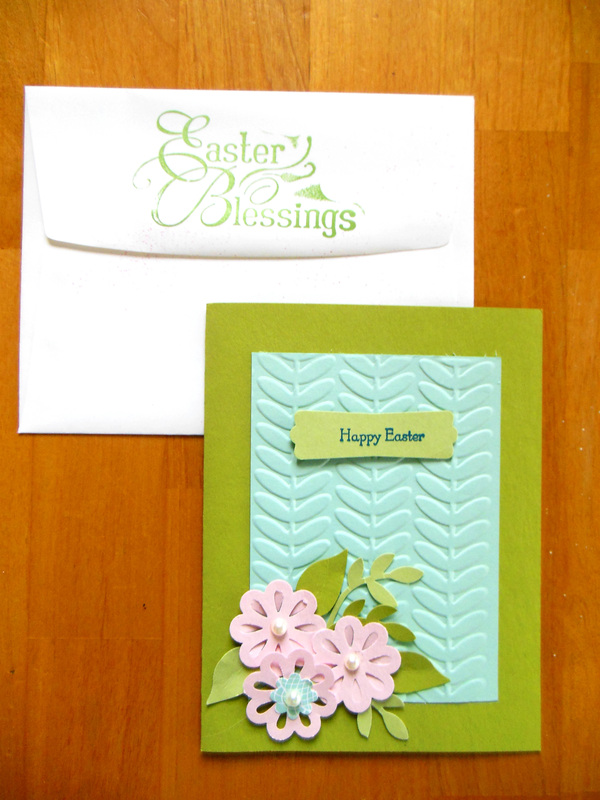
After remarking to someone very dear to me that no one had left a comment to win this free card (even though the views were quite high) She pointed out that it may not appeal to everyone. Therefore, I decided that the greetings on the inside would be customized to what the winner liked!
1 Comment
DON'T FORGET: post a comment by March 31st for a chance to win a special Easter card! (I will post a picture of the card either Wednesday or Thursday)
I just received a new delivery from Stampin' Up! and I am very excited about these new stamp sets, punches and other tools! I will be making more manly cards and also breaking into other areas like art journals. Here are just a few pictures of products to give you an idea of what's to come: Hi Everybody!
I decided it was time to change my page design and Spring-it-up a bit. The winter has been dragging too long and I am more than ready for the warm weather and sunlight. What about you? Leave me a comment and contact information by March 31st for a chance to win a free Easter card! Just wanted to share these new birthday cards with you. This one I did for a special lady who has been sweet over the past 5 years (I think it's been that long!) and always brightens my day with her smile and so many little things that make my life easier. I did this card on lucky limeade card stock from Stampin' Up! On top of that is some designer paper and lace washi tape on the right side. Then on top of that I stamped a flower and butterfly image from the nature walk stamp set. I sponged on fresh grapefruit (the color, not the actual fruit - haha) around the edges which I had grunged up. The birthday wishes stamp was also done with fresh grapefruit. The butterfly was hand colored on watercolor paper, cut out and attached with 3- dimensionals. It still looked kind of bare so I sewed two of the sides with green floss (I think that's what it's called) from a gift set I had gotten from my friend Denise (yes, CIA agent Denise*) The white flower, I thought added a nice touch. I always stamp the envelopes with a greeting as well. Then I stamped a greeting inside. All the products I used, except the floss and the tool I used to make the holes, came from Stampin' Up! *see my blog from 2/16/14 "Valentine spy treat", if you are confused! The card above I also used all Stampin' Up! products, except the white flower brad. The base of this card was also made with lucky limeade card stock. The designer paper on top of that came from a small pack of designer paper. I used a lacy corner punch on the edges to break up the pattern and also because I like the look of it. Then I used one of my three layered punches and my flower punch to make the yellow flower. It seemed too bright so I toned it down on the edges with some wild wasabi (don't you love the names of these colors?) I thought the inside needed something extra and punched the corner just to coordinate with the outside. This card is for sale and you can see it on my store page and my gallery soon.
I am going to be working on new cards and products over the next couple of weeks, so please stop by often. It is starting to become a pattern of mine to create new items during the latter part of the week and then get my "photographer" to upload them to my site on the weekend, so Sunday is probably the best day to check out what's new. But of course, life is full of surprises, so you never know what might show up during the week!
Here are the pictures I promised you: My colleague, Capri, had the brilliant idea of getting quotes from everyone to make something more personal than a just a card, something Trevor could remember us by. Anyway, I printed about a dozen quotes on 4" X 6" unlined index cards. Then I pasted them to coordinating pieces of card stock for durability and either stamped or sponged images on them for interest. The photos below are of the quote pages: I then put these pages into an album. The outside of the album I embossed with the "alligator leather" folder in my Big Shot machine. I used the string and brad closure to keep the album closed. I punched the circles with some coordinating card stock and some animal print brads to hold the string. I was going to use those locking key rings to hold the pages together, but ended up using ribbon instead (my daughter's idea) As it turns out, it looks more "antiquey" this way. I decided this little album needed to go into a suitcase. This little "suitcase" believe it or not was made from a box of hot apple cider packets. I used 2 layers of gesso, 3 layers of acrylic paints and a layer of clear glaze. The third layer of paint was mixed with gesso to build up some texture which I pressed with an embossing folder to give the impression of alligator leather. I think next time I'll have to use a sculpting medium because once I added the glaze, the texture flattened a bit. I then made a handle using the same embossing folder with Stampin' Up! Early Expresso card stock. I cut some slots on the side to attach it and then brads to hold it in place. The handle is not really functional but doing it this way gave it a more authentic look. I glued Stampin'Up! designer paper (that looked like a fabric you might find in a real suitcase) with photo glue and also Stampin'Up! sticky strip which is wonderful for holding heavy duty items together. Then I sponged Early Expresso ink, (also from Stampin' Up!) with a sponge dauber along the edges to get rid of the white edge and also along the crease lines to make it look worn and grungy. Then I fastened the sides together with clunky silver brads to give it a masculine look. I made this pouch to make the suitcase look more authentic and also to hold the Panda Express gift card we all gave him. You can see how it looks attached to the suitcase in the photo above. So what do you think of this project?
I am working on a "card/mini art quote album" for a friend at work. He is leaving our office to work in another. I decided to make this project for him in part because everyone else always puts things together for birthdays and other events so I thought I'd take a turn and partly because I am now anxious to do an "art journal" of my own and I figure this is a sort of jumping off point. I don't want to say anything else just now in case he reads this, so look back in a few days for how this turned out
|
Archives
February 2016
|